
Linux Kernel based Virtual Machines (KVM) was introduced in Linux kernel version 2.6.20 (Feb 2007) and utilizes hardware virtualization extensions of capable processors. Targeted processors are the Intel VT capable processors and the AMD AMD-V capable processors.
Host virtualization is enabled by KVM and QEMU working together to provide a Linux hypervisor. KVM provides the hardware device abstraction and interface for QEMU while QEMU provides the processor emulation layer. KVM is a Linux kernel module (/lib/modules/version-number/kernel/arch/x86/kvm/kvm.ko) that turns Linux into a hypervisor. The guest OS running on KVM is executed in user space thus making each guest instance look like a regular process to the host kernel. Regular process management commands like nice, renice,ps and kill can all operate on the guest VM process. There is also one QEMU/KVM process for each guest OS running on the host system. Look for a process named qemu-system-x86_64.
Libvirt is an API library, a daemon (libvirtd) and a command line tool (virsh).
The BIOS settings also have to be set to enable the processor VM features. For example, on an HP system one enters BIOS settings (ESC on boot) + Security and set the following:
- Virtualization Technology (VT-x): Enable
- Intel VT for Directed I/O (VT-d): Enable
(reporting I/O device assignment to VMM through DMAR ACPI tables) - Intel TXT(TL) Support: Disable
(Trusted Execution Technology support) - Save changes and Exit
Check to see if your processor is KVM capable: egrep '(vmx|svm)' --color=always /proc/cpuinfo
- Red Hat/CentOS: Use the "Add/Remove Programs" GUI: System + Administration + Add/Remove Programs + Virtualization
(View program categories: yum grouplist | grep -i virt)
or yum install kvm virt-manager libvirt - Ubuntu 16.04/Debian: sudo apt-get install qemu-kvm libvirt-bin virt-manager
Verify installation is copacetic: virt-host-validate
  QEMU: Checking for hardware virtualization                                 : PASS
  QEMU: Checking if device /dev/kvm exists                                   : PASS
  QEMU: Checking if device /dev/kvm is accessible                            : PASS
  QEMU: Checking if device /dev/vhost-net exists                             : PASS
  QEMU: Checking if device /dev/net/tun exists                               : PASS
  QEMU: Checking for cgroup 'memory' controller support                      : PASS
  QEMU: Checking for cgroup 'memory' controller mount-point                  : PASS
  ...
  ...
- Turn on network packet forwarding:
Edit file: /etc/sysctl.conf
Set: net.ipv4.ip_forward = 1
(Default value) - Guest VMs location: /var/lib/libvirt/...
- Red Hat/CentOS 6: Load VMs upon system boot: chkconfig libvirtd on
(init script: /etc/init.d/libvirtd)
SeLinux may be an issue and can be turned off: setenforce 0 - Ubuntu init scripts:
- /etc/init.d/libvirt-bin
- /etc/init.d/libvirt-guests
List supported guest operating systems (as key word attribute and description. eg centos7.0, fedora22, rhel7.0, win7, etc):
- RHEL/CentOS 6: virt-install --os-variant=list
- Ubuntu 16.04: osinfo-query os
(Install: sudo apt install libosinfo-bin)
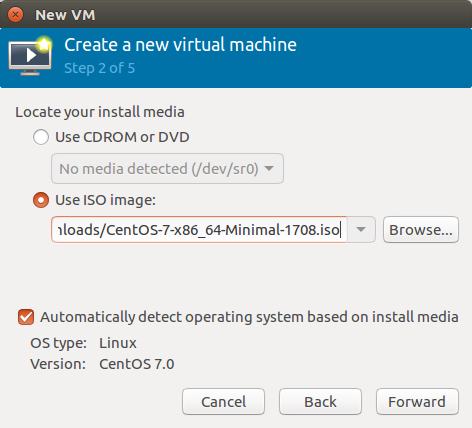
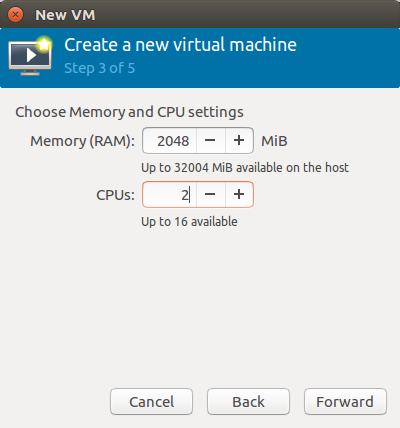
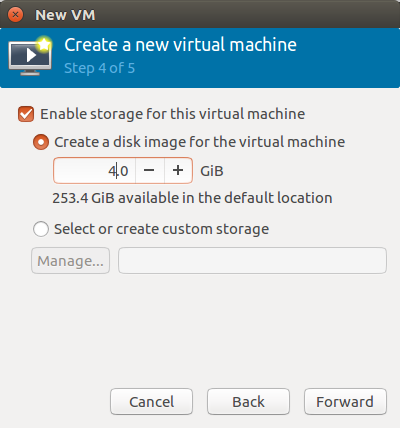
Example installation of a downloaded Linux ISO CentOS-7-x86_64-Minimal-1708.iso, installed to a new guest VM instance with 2GB ram and 4GB disk on an Ubuntu 16.04 host.
Command-line installation:
sudo virt-install --os-variant=rhel6 --network bridge=br0  \
                  --disk /var/lib/libvirt/images/guestos1.img,size=8 \
                  --disk path=/iso/CentOS-7-x86_64-Minimal-1708.iso,media=cdrom \
                  --graphics none --vcpus=1 --ram=2048 --name=guestos1
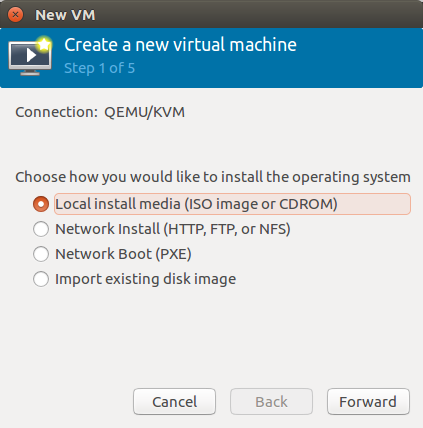
GUI Install:
sudo virt-manager

Right click + New
Forward
Forward
Forward
Forward
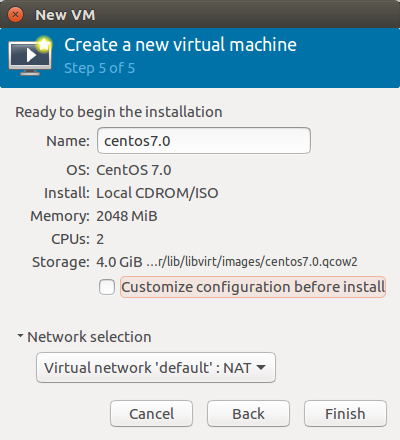
Finish
Select"Network & Host Name" and "Installation Destination"
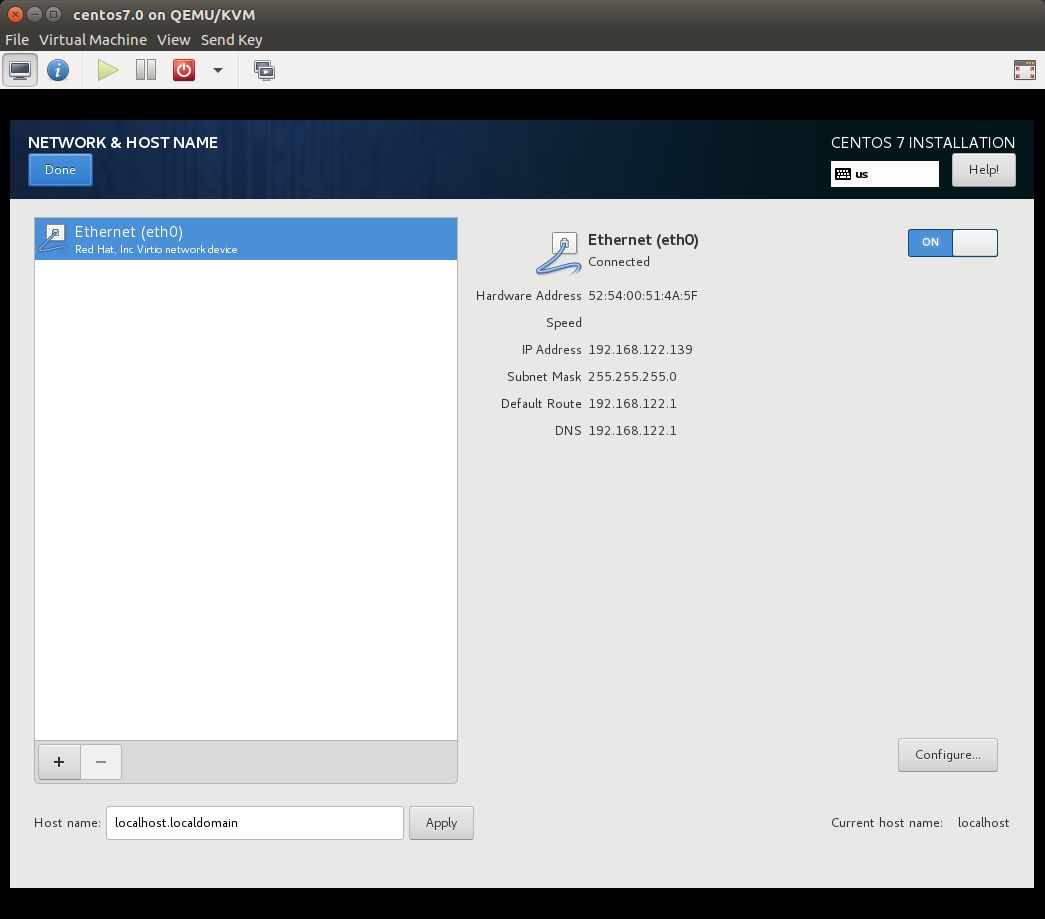
Networking is off by default, turn on.
Done
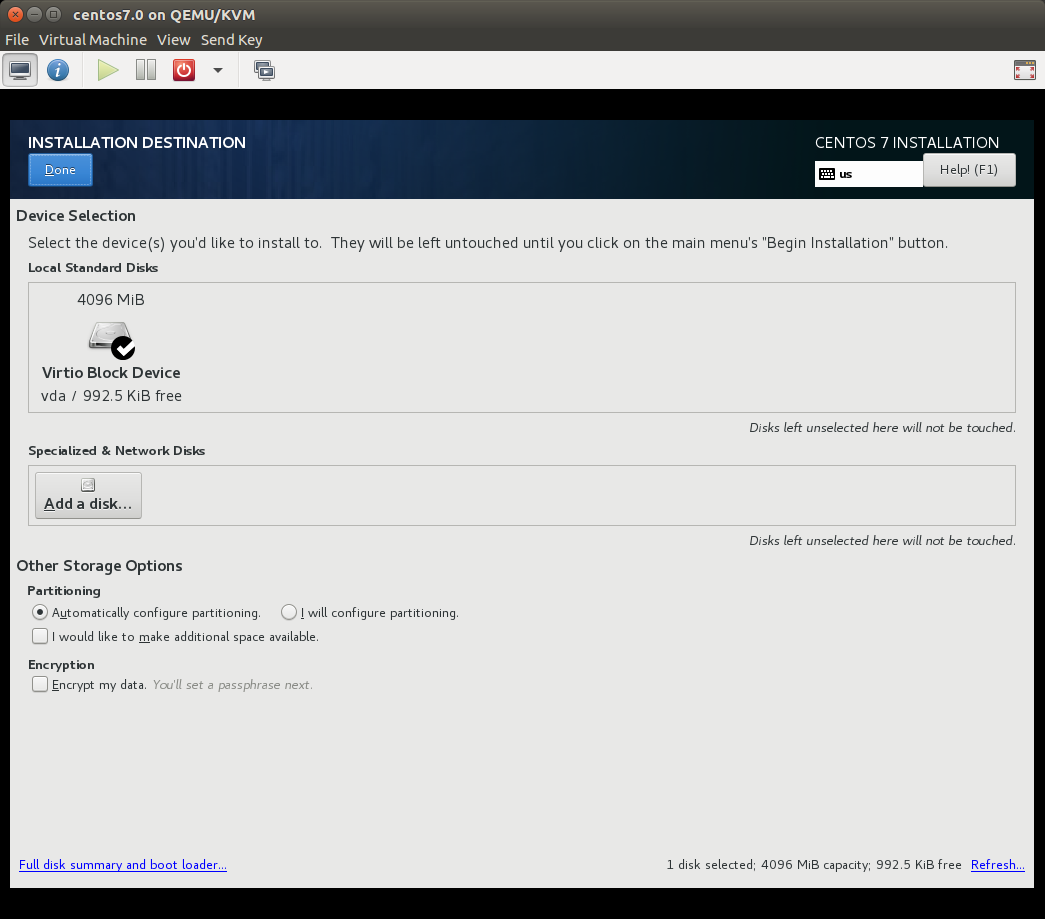
Unless this panel is selected, the "Begin Installation" button remains dim
Done
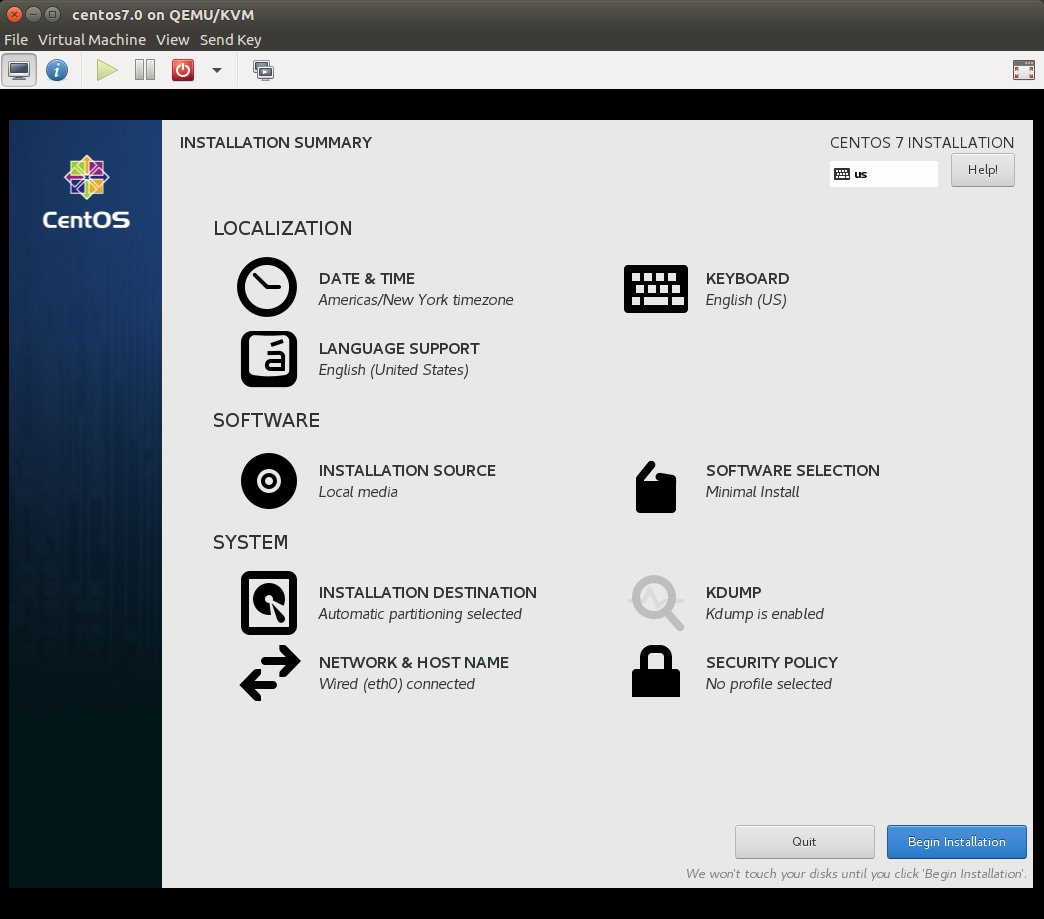
- Select "Begin Installation" on the Installation summary panel.
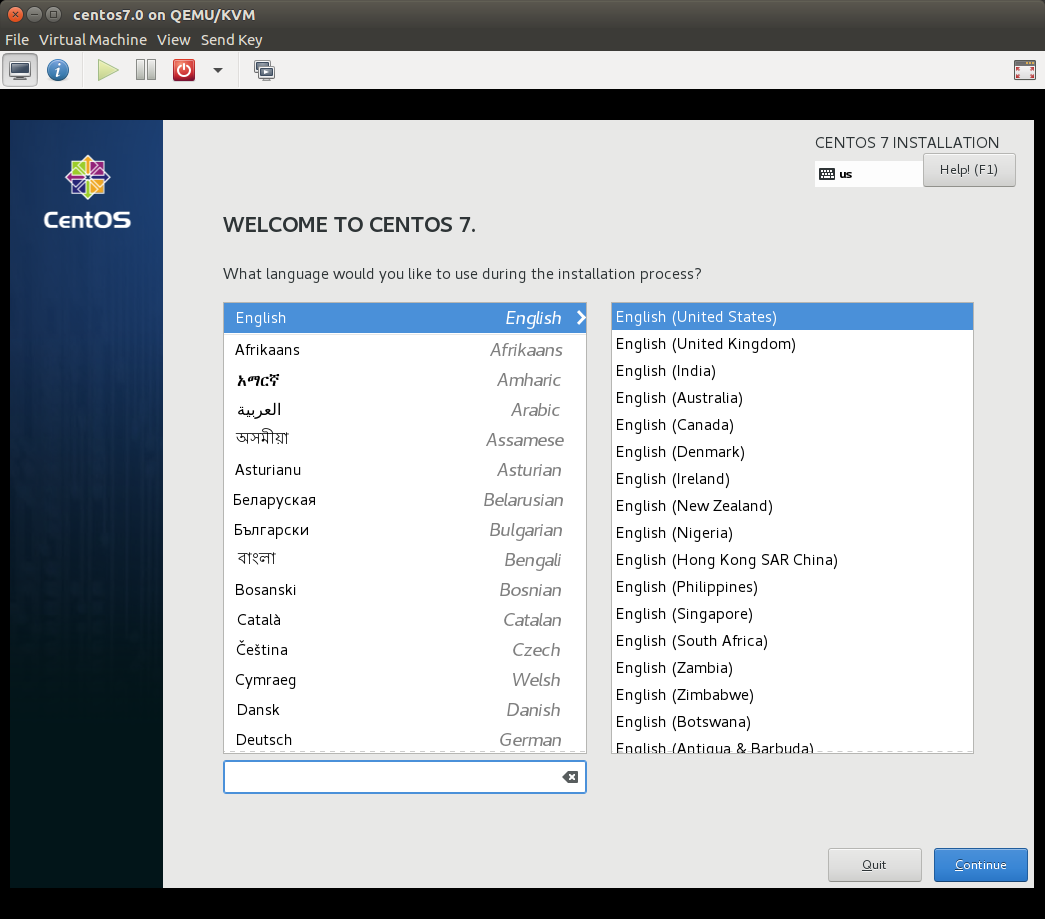
- Set passwords for root and a user. The installation will then proceed.
- The CentOS 7 installation ends with a request for a "Reboot". This will reboot the guest OS in the VM and not the host OS.
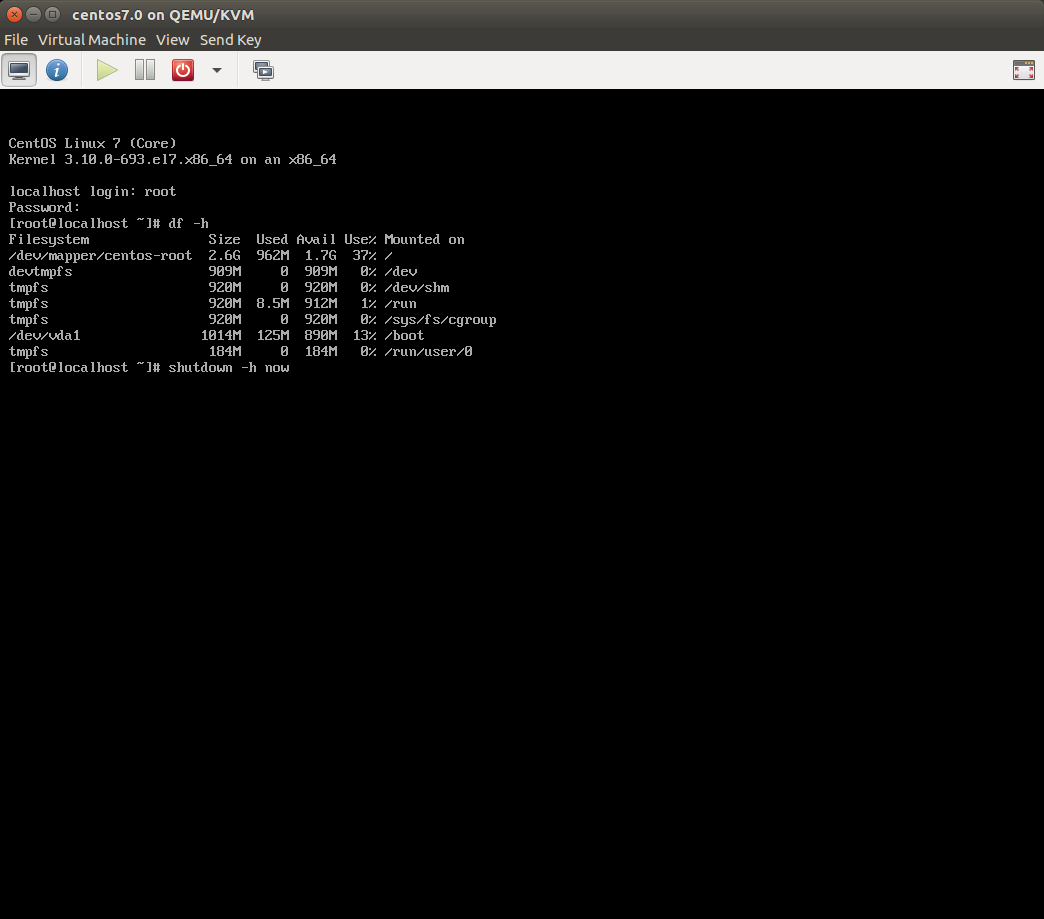
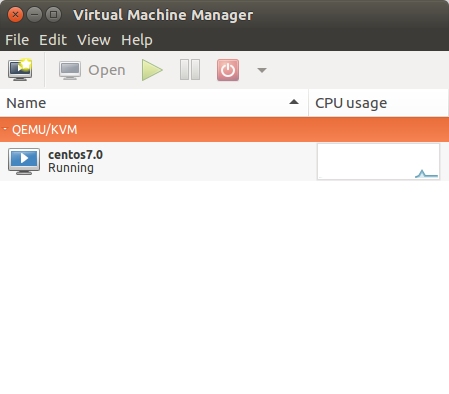
The CentOS 7 VM is up and running. It can be shutown like any other system: shutdown -h now
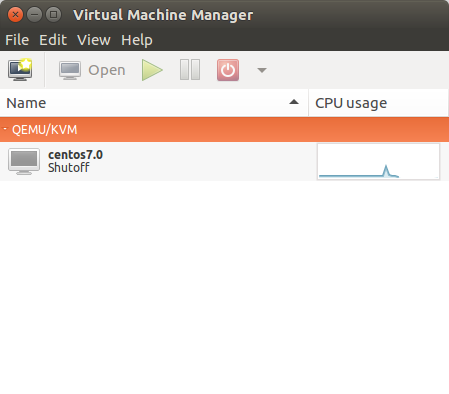
Use the virt-manager GUI to launch/re-launch any of the VMS. A console window can also be opened by selecting the VM and "Open".
The install image can be served over the network via the Apache httpd web server and accessed during the installation via a URL. First mount the ISO: mount -t iso9660 -o loop /home/user1/Downloads/CentOS-7-x86_64-Minimal-1708.iso /mnt/iso-1
Add the httpd configuration file: /etc/httpd/conf.d/iso-1.conf
Alias /iso /mnt/iso-1
<Directory /mnt/iso-1>
    Options Indexes FollowSymLinks
    Order allow,deny
    Allow from all
</Directory>
Use the URL: http://host-name/iso/
- Show VMs:
# virsh list --all
 Id    Name                           State
----------------------------------------------------
 3     centos7.0                      running
or# virsh -c qemu:///system list --all Id Name State ---------------------------------------------------- 1 centos7.0 running
- Show VM information:
# virsh dominfo centos7.0
Id:             3
Name:           centos7.0
UUID:           51162b9b-c74d-4467-8a6e-6964f8cacac7
OS Type:        hvm
State:          running
CPU(s):         2
CPU time:       19.5s
Max memory:     2097152 KiB
Used memory:    2097152 KiB
Persistent:     yes
Autostart:      disable
Managed save:   no
Security model: apparmor
Security DOI:   0
Security label: libvirt-51162b9b-c74d-4467-8a6e-6964f8cacac7 (enforcing)
- Show information about the guest VM image:
# qemu-img info /var/lib/libvirt/images/centos7.0.qcow2 image: /var/lib/libvirt/images/centos7.0.qcow2 file format: qcow2 virtual size: 4.0G (4294967296 bytes) disk size: 1.1G cluster_size: 65536 Format specific information: compat: 1.1 lazy refcounts: true refcount bits: 16 corrupt: false - Open a GUI console to the VM: virt-viewer 51162b9b-c74d-4467-8a6e-6964f8cacac7
(where the UUID is obtained from the previous command)
OR:
virt-viewer 3
(where the "Id" number is used)
- Show resource consumption: virt-top
(Ubuntu installation: apt install virt-top)virt-top 02:53:48 - x86_64 16/16CPU 1735MHz 32004MB 0.0% 0.0% 1 domains, 1 active, 1 running, 0 sleeping, 0 paused, 0 inactive D:0 O:0 X:0 CPU: 0.0% Mem: 2048 MB (2048 MB by guests) ID S RDRQ WRRQ RXBY TXBY %CPU %MEM TIME NAME 3 R 104 0 0.0 6.0 0:19.97 centos7.0Press the "q" key to exit. - Connect to the VMs serial console:
# virsh console centos7.0
Connected to domain centos7.0
Escape character is ^]
Required if there is no X server. - Shutdown a VM: virsh shutdown centos7.0
- Reboot a VM: virsh reboot centos7.0
- Boot a VM: virsh start centos7.0
- Autostart guest OS upon host boot: virsh autostart centos7.0
- Gather information about the KVM VM to transfer. Need XML configuration file. Typically located /var/lib/libvirt/qemu/centos7.0.xml
Alternately: virsh -c qemu:///system dumpxml centos7.0 > centos7.0.xml - Convert the KVM VM raw image to VmWare VMDK format:
# qemu-img convert -O vmdk /var/lib/libvirt/images/centos7.0.qcow2 centos7.0.vmdk -p
    (100.00/100%)
On RHEL6 the KVM image suffix is ".img". - Translate KVM Libvirt Domain XML file to a virt-image XML file.
Use Python script from dom2img.py [cached dom2img.py]
Translate: /opt/bin/dom2img.py /etc/libvirt/qemu/centos7.0.xml
This will generate the file /etc/libvirt/qemu/centos7.0.xml_converted
I then moved this file to my working area. - Generate VmWare vmplayer script:
- RHEL/CentOS 6/Ubuntu 14.04: virt-convert -i virt-image centos7.0.xml_converted -o vmx centos7.0.vmx
- Ubuntu 16.04: ????! Command option no longer exists!
- Edit generated file centos7.0.vmx
Change split lines to single lines.numvcpus = " 1 "to:numvcpus = "1"andlog.fileName = " centos7.0 .log"to:log.fileName = "centos7.0.log"and all the other split lines.
Also change any fully qualified path names as MS/Windows and Linux path names are not interchangable.
If these issues are not fixed, you will get an VmWare VM import error: "corrupt vmx file" - Migrate files centos7.0.vmx and centos7.0.vmdk to the system running VmWare Player and load the VMX file.
- qemu-img - QEMU disk image utility
- qemu-io - QEMU Disk exerciser
- qemu-system - QEMU Emulator User Documentation
- qemu-system-i386 - QEMU Emulator User Documentation
- qemu-system-x86_64 - QEMU Emulator User Documentation
- virsh - management user interface
- virt-admin - administration interface for modifying the libvirt daemon configuration at run-time
- virt-clone - clone existing virtual machine images
- virt-convert - convert ovf/vmx to native libvirt guests
- virt-host-validate - validate host virtualization setup
- virt-install - provision new virtual machines
- virt-login-shell - setuid shell that is used to join an LXC container that matches the user's name
- virt-manager - virtual machine desktop management tool (GUI by default)
- virt-pki-validate - validate libvirt PKI files are configured correctly
- virt-viewer - display the graphical console for a virtual machine. Uses VNC or SPICE protocol
- virt-xml - Edit libvirt XML using command line options
- virt-xml-validate - Validates a libvirt XML for compliance with the published schema
 Books:
 |
"KVM Virtualization Cookbook: Learn how to use KVM effectively in production"
by Konstantin Ivanov ISBN #178829467X, Packt Publishing (June 16, 2017)
|

|